Monday, February 20, 2012

The Lessons of Cheryl's Kitchen - It's Okay to Be Cheesy


Few things in life epitomize my feelings about the social purpose of food quite like fondue. It's perfect for cold weather and any size of party can benefit from having a melt-ey pot of goodness for your friends to commune around. This is likely a result of having a childhood where the little orange fondue pot of my mother's was frequently out on the table. There are so many options that I've even thrown dinner parties where the entire multi-course menu was comprosed of types of fondue.

Growing up, it's easy to see why fondue was fascinating and such a good option for me. Above all things, it's just fun to do. From a silky smooth chocolate fondue to a more rare and exotic shabu shabu these dishes are guaranteed to be a huge hit. Now when I make it for my friends, I can feel like I'm at one of my parents parties. Just a group of good friends gathered, sharing stories, joking, and simply enjoying some quality time with one another. 

Personally, and we probably have my mom to thank for this, I still feel that the king of these dishes is the swiss-style cheese fondue. Anytime I would smell the gruyere and white wine concoction simmering in that little pot... I probably wasn't too far behind with a piece of bread. Therefore, it should be no surprise that I often make this dish when I have friends over. By it's very nature it encourages talking and laughter, and it's just the right amount of messy. It's a socially acceptable way to play with your food.


This was absolutely the case this Sunday when I invited my friends Tom and Matt up for fondue and dessert. 


I'm so fortunate to have found a great group of friends so quickly after moving up to Wisconsin from Ohio. We've gotten together for tours, go out to the most chic of local watering holes, and (most importantly) gather regularly to make dinner with one another. I would never have imagined that I would feel so at home after moving so far away.


This was actually the second time we've had fondue, this time because Matt was unable to attend the first fondue party we had thrown. With 2 of the regulars out of town, and maybe just a little bit because of a personal craving, I had promised him we would get together and make cheese fondue(not originally on the menu). It was definitely the right dish considering the temperature outside and because all too often whoever is cooking is stuck in the kitchen. Fondue also ensures that everyone can eat at the same time, which I like.


All tolled, most of my mom's lessons are still sinking in. One though has always been apparent. If you have good food and good friends and spend time to bring them all together, everything will seem just a little more right with the world.


(My Spin on) Cheryl Coalmer's Traditional cheese Fondue:


2 Cloves garlic peeled and crushed
1c Dry White Wine (Chardonnay works well, any full bodied dry white that isn't too fruity is perfect)
1T Kirschwasser
Pinch of Kosher Salt
3 pieces of blade mace
8oz Emmenthal Cheese Shredded
6oz Gruyere Cheese Shredded
3-4t cornstarch (the more you use the more viscous the fondue will be)
pinch of white pepper
Fresh Grated Nutmeg (optional)


Cubes of Dry Bread, marinated and grilled steak tips, vegetables, pretzels, etc. for dipping.


Take the garlic cloves and rub the bottom and lower sides of a medium saucepan until evenly coated with the garlic juices and throw away the garlic. Add the wine, kirsch, salt, and blade mace and bring to a simmer over medium-low heat.  
In a bowl, toss together the shredded cheeses, cornstarch, white pepper, and nutmeg until the cheese is lightly coated in the dry ingredients.
Remove the mace from the wine mixture after it has simmered for a few minutes. Increase the heat to medium.
Then, in VERY small amounts, add the shredded cheese to the pan, stirring with a whisk until the cheese has melted and dissolved into the wine and allowing the mixture to return to a simmer before making the next addition (This is key, if you add the cheese too quickly allow temperature of the wine mixture to drop too low it will become a gooey lump of cheese in a cloudy bath of wine soup)
When you're done adding all of the cheese taste the fondue and add any needed spices or salt to taste. 
Transfer from the saucepan to a fondue pot, hand out the forks, and have fun.


Trust me when I say this will be a HUGE hit every time. Also, rest assured that I will make other posts regarding different types of fondue in the future. Until then... stay cheesy.

Saturday, February 11, 2012

Discovering the Basics


I'm Baaaaack. After a Year-long hiatus, a 500 mile move, and a complete-life change, I'm back to parlaying my loosely defined, fully amateur, kitchen wisdom (if you can call it that). I have a lot of back-writing to do, so stay tuned. My kitchen is smaller, the dishes are getting increasingly more complex (more delicious too) and I am dead-focused on bettering my techniques. 

At times I think my life is a lesson in circumventing the lessons that basic things have to offer. I have a long history of diving, feet first, into things and swimming around until I have a "jack-of-all-trades" understanding of these things. Though often a hard lesson to learn, harnessing the power of the basics can be instrumental in discovering the subtle differences between an amateur and a master.

Thus is the case with stocks. Often a basic ingredient in many a repetoire, a stock serves as the foundation of a great dish. In french they are referred to as "fonds du cuisine" or, loosely translated, the foundation of the kitchen. Julia Child takes this a step further calling them the "working capital of the kitchen" and hence the term "stock".What I [now]  find sad is that all too many times I and many others I know are comfortable using a purchased, off the shelf stock to prepare my meals. After this last week, however, this is far more likely to be the exception rather than the rule.

Why? Because last week, I discovered the power of veal stock.

Veal stock is the ultimate argument for tedium in the kitchen. Sure it's easier to pop the top off a box of culinary stock from a store, but when tasted side-by-side with a dish made with fresh, delicious, homemade stock, the comparison is night and day. Thus was the case with a chicken marsala that was, quite simply, amazing.

Making stock is not glamorous, it isn't quick, it isn't easy, and it's damn hard to come across the ingredients in today's "everything is pre-prepped" world. Being completely unfamiliar with my new surroundings, finding veal bones adequate for making stock was harder than I was prepared for. However, after a few calls, I managed to get hold of about 8 lbs of bones and I took to making Michael Ruhlmans basic recipe for a classic veal stock.

Now, Unfortunately, this recipe is not mine... and is copyrighted... and so you won't be seeing it unless you pick up a copy of Ruhlmans book The Elements of Cooking (which would be a worthwhile purchase to begin with). But any basic stock recipe will do just be sure to substitute with veal bones as the natural collagen in these bones is what makes for an amazing tool of the kitchen.

This week's discipline: Preparedness

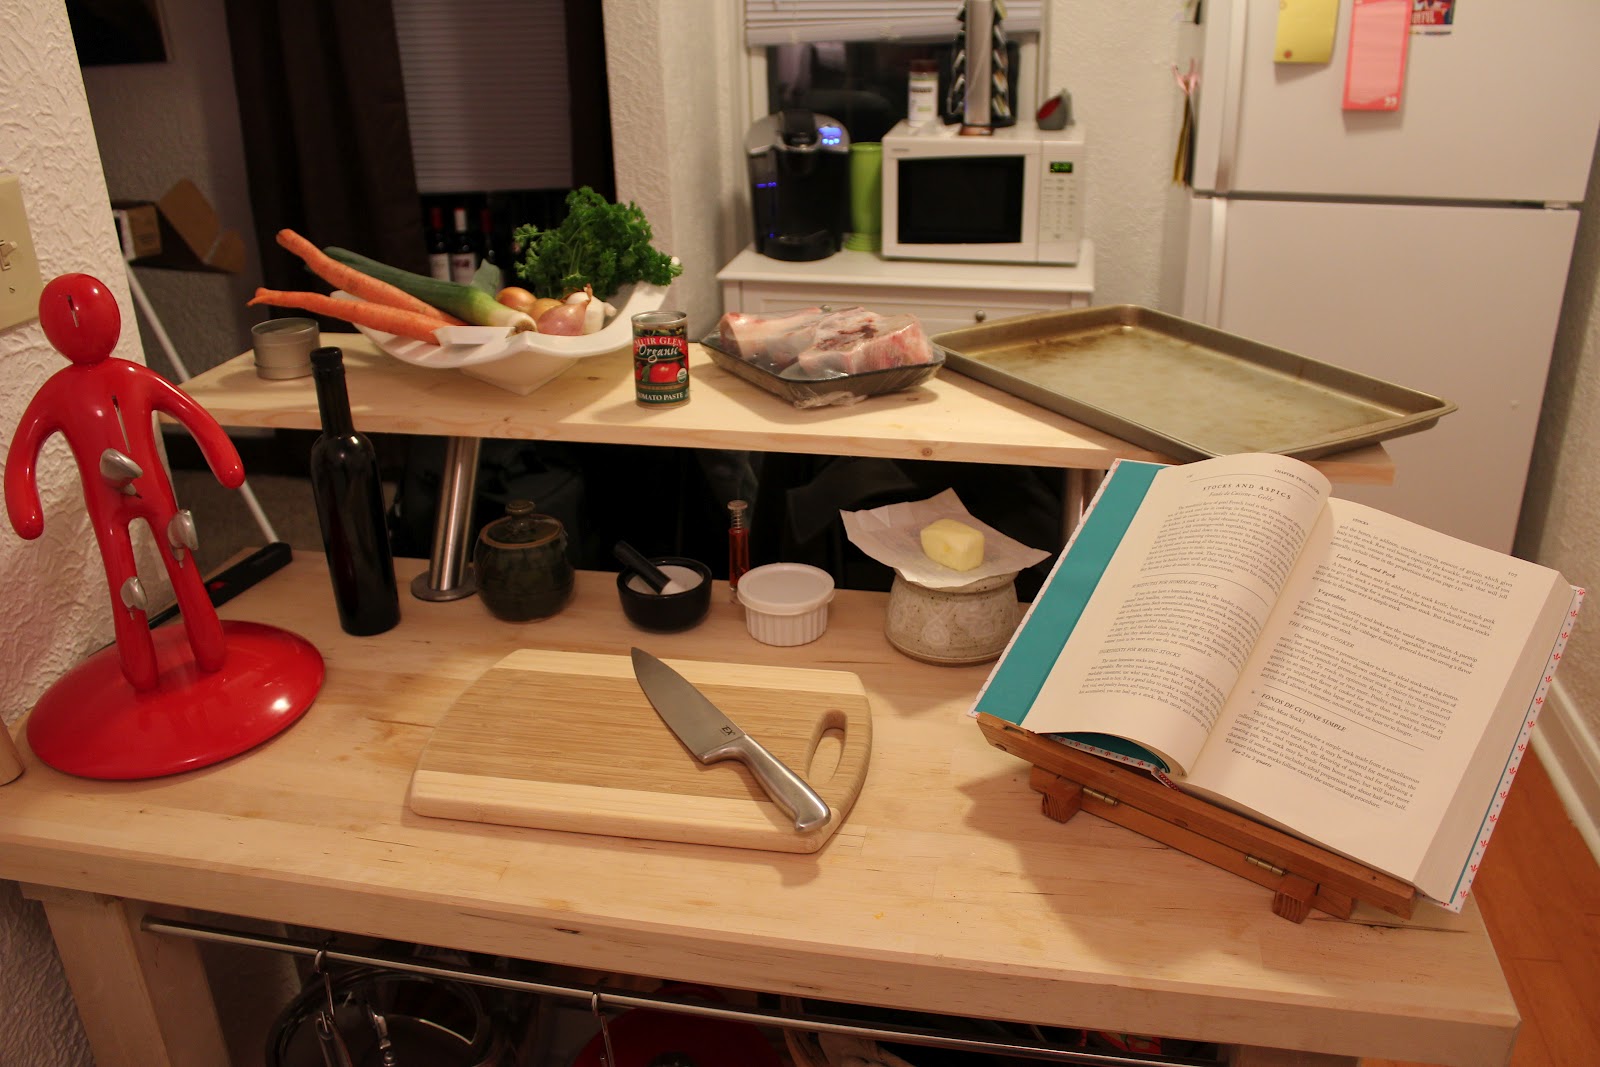
How do you teach a grown adult male who is the general equivalent of a twelve year old boy with a crippling case of ADHD and zero organizational skills to be prepared? Start with the basics, make it fun, and throw in a couple of fancy foreign terms. I started the stock by setting my "mise en place" which is just a fancy way of saying: "take every thing you need to do what you're about to do, and put it in one place in an organized fashion." This way you aren't making 100 trips to the cabinet or searching for your tools. To some people this is simple logic... to me, it's a revelation.

Next was the prep: Roasting the bones.
Then Came the simmering and skimming of the scum


Then the aromatics:


Then, nearly 10 hours later... The finished product:


It truly has been a labor of love, but every dish I've made thus far has been a complete change. Trust me when I say that it was long, tedious, at times required more focus than I could give, but it has made a significant impact on the way I view food preparation. It is recommended that you use up your stock within 2-3 days of making it. One taste, and I guarantee it won't even last that long. Hello Wisconsin!

Wednesday, October 6, 2010

A Spicy Sunday


Here's a quick entry for those of you looking to make a quick, delicious homemade meal. 

These little numbers are black bean and mushroom quesadillas. Spicy, delicious, simple and incredibly filling. 

Here's how they come together:

Start by making the black bean "paste"
3-4 Serrano chiles seeded and diced
1-2 cloves hot garlic (ie Georgia fire)
1T chopped dried onion
1T cumin
1/4t crushed red pepper
Healthy pinch of salt
12 oz cooked black beans

Start by heating some olive oil in a saute pan over medium heat. Then lightly sauté the diced peppers, onions, garlic, red pepper salt and cumin until the peppers start to get squishy. Add the black beans and allow to get warm. Remove from the heat and place in a mixing bowl then mash the mixture with pastry mixer. Set aside

Next sauté a container of sliced button mushrooms in a little butter until brown. And remove from heat and set aside

Last assemble and cook the quesadillas.

12-14 white corn tortillas. (Heated in a microwave for 1:30)
6-7 Slices pepperjack cheese.

Take one tortilla and layer a slice of the cheese and a layer of the mushrooms on top. On the other spread about 2-3T of the black bean mix to form an even layer that nearly reaches the edge. Place the cheese mushroom one tortilla side down in a buttered skillet that's at just below medium heat. Watch the cheese an as soon as it gets all meltey, place the bean tortilla, bean side down, on top of the mushroom tortilla. Flip the tortilla and allow to brown. Remove from pan and repeat. 
Serve while warm, and try to control yourself.

Blogged from my iPhone

Wednesday, September 22, 2010

The Lessons of Cheryl's Kitchen - Don't Be a Chicken


To say that my brother Kurt and I were picky eaters is probably the best example I know of an understatement. I'm sure, then, that it came as quite the shock when my mother discovered just how much I loved her chicken cacciatore.

To the mother of 2 sons who's idea of exotic food was to order black olives on their tacos, it would seem rather odd that one of them had a terrible habit of stealing bites of such a complex, vegetable laden dish from the slow-cooker. But from the moment I first tasted my mom's chicken cacciatore, I knew that I had at least 2 true loves: butter and wine.

Now, it may have been unbeknownst to me that these were the subtle flavors underpinning this rare dish which were drawing me back to the crock with a big spoon over and over again, but that's precisely what they were. I knew there was tomato sauce, chicken some vegetables, olives and that you ate it over rice. Little did I know that that "different taste" that I was getting was the savory taste of the butter and the headiness of the wine.

Over the years I've come to know quite a few savory dishes prepared with wine and brandy. The subtle yet profound taste that these ingredients offer to a recipe never ceases to amaze me. I can even recall on one occasion eating my own body weight of a particularly good Boeuf Bourguignon that my friend and self-proclaimed sous chef Rina, (even though she is FAR more advanced than I in the kitchen) had made.

What I've come to love the most about this recipe though (other than it's downright irresistible taste) is the story of how my mom developed the recipe. It is a prime example of the truly inquisitive, experimental and headstrong nature I get from my mother. Although I'm not certain of the specific details, I do know that the recipe is the result of her resolve to recreate a dish she had while out to dinner with friends. Although I don't know how accurate the recipe is in taste to the one she had that night, I do know that because of it, the smell of this wonderful Italian stew still has me headed for the crock pot with a big spoon over and over again.

I'm fairly certain this is a recipe my mother made from memory, and so the details on this one are a bit fuzzy. Nonetheless, if you were within a few hundred yards of my house growing up and could smell this stew in the crockpot, chances are I wasn't too far behind with a spoon.


Mom's Chicken Cacciatore

3 Large chicken breasts Cut into medium chunks and dredged in flour
2T Butter.
a Large container of Mushrooms (halved or sliced)
Olive Oil (for sauteeing)
2 Green peppers, seeded and sliced
1 medium yellow onion chopped
3-4 large cloves of garlic, chopped
2 large tomatoes, diced
1 small can black olives
1/3c Tomato sauce
1/2c Dry White wine.
1 1/2t oregano
1/2t basil
1/4t kosher salt
(Although it's not a part of the original, I add 2T capers)

Melt the butter in a pan over med-high heat and sautee the dredged chicken until brown, set aside in a waiting slow cooker. Into the pan add the olive oil garlic and mushrooms and sautee until the mushrooms are cooked but firm and brown (and "Don't crowd the pan!"). Add these to the slow cooker. Next add the onions to the Pan and sautee in more olive oil until lightly brown. Next, add the wine and salt to deglaze the pan and remove from the heat.
Add the onion mix to the chicken in the slow cooker and add the remaining ingredients and stir. Allow to cook on medium heat for at least an hour. Serve this over steamed rice and as you can see I love it with a bit of thymed broccoli.

Viola! there you have it, a delicious stew that you can make ahead that everyone will love. Trust me, if a kid as picky as I was would eat it... so will yours.

Wednesday, September 8, 2010

Let it Flow


Summer is the perfect time for many things; Vacations, swimming, picnics, and the like. To me though, summer represents an opportunity to take advantage of some of the freshest produce you can get your hands on. Sometimes this is a necessity to escape the heat, while others it's the perfect excuse to heat up your gatherings.

Case in point: Sangria, one of my favorite adult beverages. Why? Well, because with many of my other favorites, it's easy to make ahead, looks amazing, and is always a huge hit with friends. When you pair all of this with some incredibly fresh fruit, you've got the makings of quite the crowd-pleasing cocktail. Be it a Traditional sangria or something more inventive (Read: try making a spiced sangria with sliced pears, etc) people never seem to lose the intrigue that comes along with such a beautiful drink.

Now as you may already know, Sangria is a Spanish word meaning bleeding. This is because traditionally, sangria is made with red wine and citrus fruits. Nowadays though, it has come to mean any wine based drink that is infused by soaking pieces of fruit in it. I always encourage breaking with tradition and so, you can see that the end result is not deep red, but rather a nice pale yellow. In this version, I've used a decent but not overly complex white wine. Try to pick something that lends itself nicely to the flavors of the fruit you're using. White wine is almost synonymous with summertime because of it's clean, crisp flavors and often the fact that it's served chilled. It's for this reason that it was the obvious choice for my end of summer soirée.


Even moreso here than with my other recipes, sangria can be tweaked to meet the specific needs of your party. Therefore, I'm generalizing on some of the specific portions in the recipe.


Summer Sangria:


1.5L of Semi-dry White Wine.
2c Sliced fruit (Take free license here, but I used: White Grapes, Nectarines, Strawberries, and Mango)
3T Fresh Lemon Juice
3T Triple Sec
1/3c St. Germain (if unavailable, use 1/4c more Triple Sec)
1/4c sugar (optional)


Preparation couldn't be simpler. In a large airtight container, mix the wine, sugar, triple sec, st. germain and lemon juice until sugar is dissolved. Add the fruit and seal the container. Allow to sit in the fridge overnight, at least 3 hours to allow all the flavors to infuse.


When it's time to serve, use your favorite punch bowl or pitcher, and just watch how fast it disappears.


Tuesday, September 7, 2010

The Lessons of Cheryl's Kitchen - Dessert Comes First


[UPDATED: Added my Mother's Comments Below.]

I've always considered my mom to be more of a baker. The list of cakes, pies, cookies, breads, and other goodies from the oven are far more prevalent in my mind than the other things she makes. Within these recipes, the highest order of them are the sweets. My mom is definitely a force to be reckoned with when it comes to dessert recipes. From the simple covered dish-style desserts, to rather complex cakes and pies, she's a whiz with things of the sweeter persuasion. Which, I'm sure is why I have such an insatiable sweet tooth.

Now, although I'm sure I'll write about a few of these different desserts over the course of this series, one recipe sticks out as the first one due to its flexibility, simplicity, and irresistibility. Not to mention that I made it just the other day for a picnic, in lieu of my mom making it, and saw exactly how popular it is. (we'll get into this in more detail a bit later.) If you've ever been part of the equation: Cheryl Coalmer + Fruit + Summer|Fall + Oven = _____, you'll know that the best answer is her Cobbler. Not only that, but my brother and I knew it too. If she left one on the counter too long, I'm sure she knew to expect that it would be gone by days end.

For a single mom raising two (often challenging) boys, cobbler was always a good option. It's simple to make, tastes AMAZING, is downright heavenly with Ice Cream, transports well, and is always a crowd pleaser. Because there are so many traditions surrounding food in my family, the opportunity to make this one often presents itself. Thus was the case this summer at my Aunt's annual summer picnic. The only problem was, my mom wasn't able to attend. I guess this meant I was going to need to fill that void.

Although I'm not certain where the origins for my mom's affinity for making cobbler lie, I am certain that it's only grown steadily in popularity. From The blueberry cobbler I made here in the summer, to peach cobbler right before fall, it always seems to be a perfect fit no matter what produce is in season. The simplicity inherent to the batter is perfect for letting the best produce shine through. To top this one off, it's got a crunchy sugar crust that makes you want to break through the beautiful browned goodness.


Cheryl Coalmer's Fruit Cobbler:
[note: to simplify, I'm giving the recipe for blueberry cobbler (mine and my Uncle Keith's favorite.) feel free to change up the fruit, but there are certain alterations you'll want to make to the recipe for various fruits.]

To start, prepare a pan for the cobbler.
You'll need:
An 8"x8" pan, medium casserole, or a deep pie pan.
1 to 1 1/2 quart(s) of fresh blueberries washed, dried, and stems removed.
2T fresh lemon juice
2T flour
1T sugar

Place the blueberries in the baking dish and add lemon juice. Coat the blueberries with the juice using your hands. Next sprinkle the flour and sugar evenly over the blueberries and again mix with your hands to coat the blueberries. Set aside.

Next prepare the cobbler batter.
You'll need:
1/2c unsalted butter, melted.
1/2c 2% milk
1 1/2t pure vanilla extract
1/4t kosher salt
1 1/4c all purpose flour
1/2c sugar
1 heaping teaspoon baking powder.

Mix butter, milk, vanilla, and salt in a large mixing bowl. Set aside. In a separate bowl stir flour, sugar, and baking soda together. While stirring add flour mixture to the butter mixture. Continue to stir batter until the flour begins to agglutinate (my mother's recipe card reads: for a few minutes longer than it takes to mix, until the batter gets stretchy)

Next prepare the cobbler for baking.
You'll need:
1c sugar
1/4c water

Take the batter and spread it over the blueberries until all the batter meets he edges of the pan and covers all the blueberries. Next, in a pourable cup, mix the sugar and the water thoroughly. Pour this mixture evenly over the top of the batter. Bake in a 350 degree oven for 50-60 mins or until toothpick inserted in the center comes out clear. Allow to cool and serve while warm (over vanilla ice cream, yum! Or, allow to completely cool before covering. (note: it's the sugar crust that makes this cobbler so wonderful, and if you cover the cobbler while it's warm, it won't be so crunchy/delicious.)

I hope mom isn't upset at me for sharing her famous cobbler recipe, but I doubt she is. My mother always seems more than happy to share all of her best. Hopefully this will be the case with her stories about this fantastic dessert. (She might be for the photos, though)

Mom's Official Response:
"Firstly,did you get the blog I sent last tues??  
  
I would just like to comment that your dad loved cobbler, so I was always on the lookout for a good cobbler recipe... though I never could get it exactly right for him. He would say "that's really good but I just want you to drop the batter on top and I want it to be firm"  So I think he would have loved this recipe, but unfortunately I found it after he passed in a cookbook that grandma alice bought for me from the Methodist Church (church people can sure cook and eat) so they always have the best recipes
 
Also, at Thanksgiving time I would like you to post my Pumpkin Chiffon Pie recipe that I won the Review cookbook contest with back in 1985 or 1986. I won $25, but spent at least that much making it because eggnog was a seasonal item and was not out in the stores yet. So, I had to make my own Eggnog too!!!!! I have a copy of the paper with my picture holding the pie that you can scan and put on blog also.
 
Talk soon. Love ya

So... perhaps we'll have a photo of my mom from the paper in the 80's soon.

Friday, September 3, 2010

Plaisirs Simples

Lately, French cooking seems to be on a huge upswing in popularity. This is a trend that seems to periodically crop up from time to time in American food culture. This time around the popularity is likely attributed to pop culture, specifically movies like Julie and Julia. Although, I believe the reason it keeps making it's comeback is because, as a general rule, French cooking is steadfastly rooted in classic methods that are cornerstone to cooking.

Now, when someone mentions French cooking, one almost invariably thinks of complicated soufflés or odd main ingredients (escargot, anyone?). But as with any style of cooking, these are extreme elements of the style, and should not discourage you from making the easier, more mainstream stuff.

These little chocolate truffles are such a great example of one such dish. Simple to prepare, but as I found out, one that can still present it's own unique challenges. This was definitely the case this time around, because I know that chocolate can be a wildcard ingredient.

So undaunted, I set about making my homage to Julia Child's chocolate truffles.

It's not often that I will suck up my pride and write about mistakes that I make cooking, so this is a very special blog entry. Turns out that even though I preach about using the best ingredients when making food, sometimes I fail to heed my own advice. In this case, using run-of-the-mill chocolate yielded a result that was overly bitter and had an oddly soured taste. I guess this is why I always say to treat your cooking as an experiment, and learn from the results that are yielded by the various things you try. In this case, always the best chocolate for chocolate candies.

The recipe is based on the recipe from the 2nd volume of Mastering the Art of French Cooking by Julia Child and Simone Beck. However, since I had just acquired a bottle of Port wine, I decided to substitute this in place of the orange liqueur. Keep in mind the following recipe is the one where I've corrected my mistakes, so you'll also see that I've omitted the coffee as well.

Start by preparing for melting the chocolate. You'll need two saucepans; one smaller than the other so that it can fit into the larger pan. If possible use a pan with an unclad (thin) bottom.
Fill the larger pan 1/4 full with water and bring to a simmer over med-low heat.

Next prepare the chocolate.
You'll need
1/3c Chambord
1T honey
9oz semisweet chocolate broken into small pieces.
In the smaller saucepan stir the chambord and honey together and simmer over medium heat. Allow to reduce to 1/4c. Stir chocolate into the reduction and remove from heat. Cover and place into larger saucepan and allow a few minutes for the chocolate to soften.

Now prepare the ganache:
You'll need:
1/4c + 2T chilled Unsalted butter cut into about 20 thin squares.
1/4c port wine with 1t honey stirred in.
Remove the smaller pan from the larger and using a whisk or an electric mixer beat until smooth and all the chocolate is melted. Next add butter 1 slice at a time and beat rapidly adding the next slice just before the previous one is melted. Once all the butter is incorporated, beat in the port wine mixture a couple of drops at a time.

Next chill the ganache for about 1 1/2 - 2 hours until firm.

Last form the truffles and enrobe in cocoa powder.
You'll need:
1/3c cocoa powder
2T confectioners sugar
2t kosher salt ground into a fine powder in a mortar.
In a small bowl, mix the cocoa, confectioners sugar, and salt. When the mixture has become thoroughly firm, use a melon baller to scoop small balls out of the pan and enrobe in the cocoa mixture. Place each ball into a small muffin cup.
Place and keep in the fridge or freezer in an airtight container.

Again, play with the ingredients, but mostly, make sure you have someone to pass them off on, or you'll eat them all yourself. (unless they turn out like my first batch)

Posted from Brett's iPhone

Tuesday, August 31, 2010

The Lessons of Cheryl's Kitchen - Introduction.


Welcome to part one of a multi-part series of indeterminate length whose posts will be about my memories that stem from my mother's cooking. I've often said that if it weren't for my mother that I would have never picked up a mixing spoon for the first time. It's this connection of mine to food that I find to be one of the most fascinating. As I lay them out, I'll try my best to document my mother's stories, recipes, and of course my own incoherent ramblings on the subject. 

Now, I would be remiss if I didn't give a little background info on my mother before we began. So, much to her dismay, let me tell you about one Mrs. Cheryl Coalmer...

My mom was born in the same town as I was, East Liverpool, Ohio, the third of five children. Now, although my grandfather has given me a number of stories about her childhood nicknames, family photos, and other stories, not many of them (other than a noted disliking of vegetable soup) are pertinent to this blog. My mom met my dad in high school and they were married a few years after graduation.

Many of my mom's recipes seem to be borne of this time in my mom's life. Between her adapting to married life, a new home, and the influences of friends and neighbors, my mom often mentions this time as the origin of many of the items she frequently makes. Recently, my mother has given me a number of recipes that she's very fond of. Along with these recipes are the stories that she remembers surrounding the various food items. Obviously, this has become one  of my most cherished gifts. Many of these recipes (much like my own repertoire after moving out of my childhood home) are borne of this time of change in her life. From her many recipes made through the miraculous ease of Bisquick, to learning the ropes of using the first grill that she and my dad purchased, to her friendship with our neighbor (Aunt) Virginia and many others, the love of the kitchen that I've now inherited has its roots planted firmly in this place in time. 

Over the years my mothers food has become pretty popular and considerably more complex. I admire her curiosity and her open mind when it comes to food. She always seems to have the ability to impress at picnics, at dinners, at holidays and many more. I think more than a lot of the ink in my mom's pens have been spilled on 3x5 notecards given to others. I think it's from her willingness to share in her love of these items that I saw the social value that food has in enriching so many lives.

It's because of this passion that so many of my great childhood memories are possible. Although I would love to write about the incalculable number of beaters I've licked, plates of cookies for Santa, times I've nearly burned down her kitchen etc., for now I'll focus on the most fond of my memories surrounding cooking with my mother. Be sure to check the comments sections of these posts to see if she's corrected any of the recipes, facts, stories, etc., or just to see if she's vengefully posted any embarrassing stories about me.


Mom's official response:
Well son all I can say is Thank You very much for recognizing my love of cooking and for carrying on the traditions of my love for feeding friends and family. 


It seemed whenever we had company at the house we always ended up sitting at the kitchen counter... I always felt I had to feed people when they stopped by. Almost every weekend of our married life we had friends over for dinner and to play cards. 


Most of my adult life has been spent in the kitchen. Some people may think that is odd, but I do feel the kitchen is the heart of the home. Cooking has always been my vice... when I am happy, sad, depressed or just bored it has always been what comforts me. I still believe in the sanctity of the family dinner. There is nothing like sitting down to a good meal and good conversation. If this is not something you do on a regular basis with your family, then please give it a try. Get out those recipes you've been wanting to try or log onto Brett's blog and try something new!!!! 


Thanks Mom!


Friday, August 27, 2010

New phone = better photos.

Happy birthday to my real boss, Tonya!
I took the after-work celebration at SoMar wine cellars as an opportunity to test out the capabilities of my new phone's camera, and was pleasantly surprised with the results. Now, I know that wine is perennially a very photogenic subject, and a staple that makes any gathering instantly classier, but the beautiful weather just accentuated the beauty of the wine shop and especially the natural beauty of the wine.
Hopefully this means that I will be able to upload even more mouth watering photos to the blog. Keep your eyes peeled for more temptation.
Posted from my iPhone.

Tuesday, August 17, 2010

Unconventional wake-up call

So, this one is going to be just a quick entry. I'm trying out adding entries by phone, so that I can share more of what I make.

This one though is about these amazing little corn fritters I had a craving for the other morning. I don't know what exactly brought this on, but my tummy is quite content that it did.
Although I like pancakes, I was craving something with a fair amount more flavor. These just fit the bill perfectly.

First, I made a small batch of cornbread batter: (all are approximate)
3/4c masa harina (Corn Flour),
1/4c flour,
1/8t Baking soda,
1/8t kosher salt,
1/2-//3c milk,
1/3c oil,
1egg,
2 ears corn (remove and blanch the kernels) [Or use 1c Canned Corn Drained and Rinsed]
Mix dry add in wet ingredients, stir till consistent. Add blanched corn.

Then, as many a wonderful recipe entails, I deep fry the batter:
In a deep skillet heat about 3/4" oil to medium-high heat. Scoop batter slow and low into the pan in ice cream scoop amounts. Cook each side 60-90 seconds. Scoop out of the oil and allow to drain to remove the excess oil. Place on a paper towel lined plate.

Last, add some flavor:
Here I made mine with bananas and maple syrup. You could do powdered sugar and strawberry jam, toasted pecans and honey, etc. The possibilities are endless.

Sunday, August 1, 2010

A tale of a late dinner.

Sometimes, your best ideas are borne out of necessity and scarcity. Thus was the case for Horacio and my dinner the other night. As it often does, it seems like it took almost no time for us to end up at the crossroads of dwindling daylight, closed grocery stores, not enough ingredients, and (most importantly) two very empty stomachs. A truly critical situation indeed.

So what was the solution to making a satisfying meal that was quick, simple, and tasty? Horacio's answer was Flautas, and I jumped at the opportunity to learn how to make one of my favorite dishes (and add a little of my own invention to boot.

Now, I'm almost embarrassed to say that my experience with Mexican food preparation consists of emptying the contents of a box, stirring everything together, and eating the whole thing on some variation of fried cornmeal. I've been slowly introducing myself to Latin cooking over the course of the last few months, but I've failed to focus on one regional style. Perhaps this was my time to change that... perhaps.

We quickly ran to the closest open store to pick up just a few remaining ingredients, but for the most part we had everything we needed. It never ceases to amaze me that most people need look no further than their own cabinets for the ingredients to make a great meal, and this was no exception. Too often I find myself heading to the store to buy groceries I just don't need, when I have the ingredients I need to make a fantastic meal on hand. I am usually just too lazy to think creatively about it.

The flautas were simple: take chicken breast, boiled in water, salt, and just a bit of olive oil (Horacio's task). wrap them in corn tortillas, and fry in a pan. Now, trust me when I say that you could stop right here. These were so simple yet so delicious that I could have just ate them as they came out of the pan. (I believe I may have even done this with once or twice without Horacio noticing.) Fear not though, this writer hasn't lost his mind. I was ABSOLUTELY NOT content with just the flautas and proceeded, while Horacio was preparing the chicken, to make a smoky, tangy, and most importantly hot-spicy sauce to compliment the delicious little flutes. I adapted my recipe for a chipotle-lime marinade to make a thick mole perfectly adapted to top or dip these finger foods in.

I am a huge proponent in the addition of heat to my cooking, but ONLY if it has flavor. I have little respect for sauces that are hot for the sole purpose of being hot, as they usually numb your tongue and have as much flavor as my gel insoles (when new, of course). But this sauce manages to be fresh and smokey, hot and bold, flavorful and full of a heat that conjures images of the coals of a campfire where the flames have just gone and all that's left are the red hot coals; a slow burn that simply builds and builds without getting in the way of all of the flavors that are present.

The best part is, the whole meal came together in less than an hour because there were two hands on the work, and the result was every bit as good as the meals I've spent days planning. Just remember, if you can't take the heat, stay out of our kitchen.

Chipotle Lime Mole:
1 can of Chipotle Peppers packed in Adobo.
The juice of 2 limes
3T of tequila
1T Water
1/4c Cilantro (optional)

Place all ingredients in a blender and blend to desired smoothness.


Flautas:
4 medium chicken breasts
Kosher Salt
Olive oil.
Queso Fresco
Chipotle Lime Mole
Vegetable oil for Frying

In a medium stock pot bring 6-8 cups of water and a healthy amount of salt to a boil (enough to cover the chicken breasts completely.) reduce to a lightly rolling simmer and add the olive oil and chicken to the water. Allow to boil for at least 40 mins until the chicken breast is tender and can easily be shredded with a fork. Remove breasts and shred on a plate. Then, in a deep skillet, add enough canola oil to fill about a 1/4" deep portion of the pan and bring to medium-high heat. Take a small amount of the shredded chicken and spread a thin line of the chicken onto a heated corn tortilla. (horacio proved me wrong that these should be heated in a microwave for about a full minute or so prior to adding the chicken in order for them to be pliable enough. Do so while they are wrapped in a wet paper towel.) Wrap the tortilla tightly around the chicken to create the "flute" and place, flap side down into the oil for about 90 seconds. Flip and continue cooking on the other side for another 60-90 seconds. Remove from oil, tilt to drain excess oil, and place on a paper-towel lined plate.

Plate the flautas on a plate, and top with the queso and the mole. Be sure to enjoy with your fingers, or you'll be missing out on all the fun. Last, be sure to keep a big glass of milk nearby for when the chipotles max out your tolerance.

Thursday, July 8, 2010

Removing My Ribs

No, this isn't a post about me undergoing the same surgery that Marilyn Manson allegedly went through, though they say it has it's advantages. This post covers something far more important (and I mean far more important) -- pork ribs.

Ahh Pork Ribs. Undeniable summery, undeniably messy and undeniably tasty. I am in love -- my favorite meat mingling with my favorite condiment in what is one of the most satisfying and comforting meals in your repertoire.

How to cook ribs is one of the most hotly debated issues in the culinary world. Barbecue gurus from different parts of the country can't even agree on whether barbecue represents the way the meat is cooked or the sauce in which is it (sometimes) smothered. Nor can rib aficianados decide how fall-off-the-bone they should be, or exactly what cooking method should be used. Yes, folks, disagreement is the hallmark of this unique little corner of food nirvana. Read this paragraph as a disclaimer that while the way I "barbecue" ribs might be vastly different than the way you do, it results in a damn good final product.

One more thing before I get down to brass tacks -- I mentioned that some question whether ribs should fall off the bone or not. I say, they should. You should be able to grab each individual rib and yank it cleanly out of it's meaty home.

So here are today's players:

You obviously need ribs:
St. Louis Ribs.

For the liquid in which the ribs are cooked:
3/8 Barbecue Sauce
3/8 Beef Stock
1/4 Red Wine Vinegar

For delicious purposes:
More Barbecue Sauce

Simply combine all three liquids in a bowl and stir together (it will be fairly thin). Please don't measure them. Just make sure you have more barbecue and beef stock than vinegar. Taste it, and make sure it's not too vinegary. Now you're going to place your ribs in a baking pan that can accomodate and dump your saucy mixture on top. You want the ribs to be nearly completely covered, if they are sticking out a little bit that's fine. Cover tightly with foil and toss in your preheated 350 degree oven for about 3 or 4 hours (one of my good buddies once did about 10 hours once, but only because we sort of forgot about them, I don't recommend cooking them for that long).

You'll know the ribs are done when they fall apart if you look at them cross. Gingerly transfer the ribs from the liquid onto a broiler pan. Brush a coat of sauce on the ribs; toss under the broiler, lick your lips, pace around the kitchen, peak 2-3-4 times, remove from broiler (the sauce will get nice and bubbly, if you're patient, you can let it start to really caramelize nicely (I am not patient).

Break out the wet naps and serve with some mashed or crash hot potatoes and corn on the cob. No, you don't have to send me a thank you card.

A note about BBQ Sauce: I do not make my own. I use Sweet Baby Rays which, for my money, is the best commercially available sauce on the market. Feel free to doctor it up, but I doubt you will see the need.

The Simple Things

There are certain things that they say are tied very closely to memories. I believe food is definitely one of those things. If you've read my recently posted autobiography (yes, with all it's typos) you'll see that I truly believe this. Lately I have a tendency to be making some rather complex and diverse foods, but these are not the ones I tend to remember as fondly. What does tend to be tied more closely to my memories are the ones steeped in simplicity.

One of the best examples of these is Sunday morning Tea with my father. On many a Sunday morning, while waiting to get ready for church, I can remember sitting on my fathers lap, wearing an oversized tee-shirt that I slept in the night before reclined in a chair in the living room and sharing a cup of strong Lipton Tea with lots of Milk and sugar(a tradition that originates with my Grandma Margie). My favorite part of this though was the Cinnamon-sugar toast that dad would make to have with the tea.
I can remember making the tea in the microwave, I didn't even realize that normally the tea would be made in a kettle until later when I would share the same tradition with my grandmother. My father would save the teabag on the sill behind the sink to brew another cup later. I remember ignoring the television (which was invariably set to CBS sunday morning, a show no 5 year old in his or her right mind would be interested in), and I remember the sweet and savory taste of the buttered cinnamon toast being the best breakfast I could have.
Nowadays, I find that life can be pretty stressful, it can be depressing, it can seem downright overwhelming. Now I understand why my father, and my grandmother, continued these traditions. Now when I find my world to be a little overwhelming, or if I find that I miss my dad or grandma, that such a simple treat can bring back so many of the things that made me so happy as a kid. It never ceases to amaze me how happy it can still make me now.

Tea:
1 Bag strong pekoe Tea (Lipton or PG Tips works best)
2-3T of Milk
2t Sugar (at least)
8oz boiling water
Steep Briskly for 4 minutes to get a very strong brew. Grandma would always retrieve the teabag with a spoon and wrap the string around it to squeeze the bitter stuff out. stir in the remaining ingredients.

Toast:
2 slices white bread toasted to a rich golden brown and generously buttered.
2T White Sugar
3/4t Cinnamon.
mix the cinnamon and sugar and sprinkle liberally on the buttered toast as the butter is melting. Enjoy with Tea.

Sunday, June 13, 2010

A crispier side

Every now and again, I find an ingredient that I just don't know how I ever survived without. Usually these ingredients make this distinction because of their taste, but on special occasions I come across something so simple, so flexible, that it becomes a staple in my kitchen.


One of these ingredients are wonton wrappers. These little squares are probably one of the most flexible food items I've ever found. You can use them for everything sweet, savory, fried, baked, steamed. They are every bit as flexible as pasta, and yet so completely underused. I like underused though, because to me, this translates to "special"
I've used these to make foods that are always met with high regard. They've seen their way into my Best Friend's wedding shower, My first dinner invite to my new coworkers, First Dates, and the list goes on.
I think these are a perfect compliment to sweets, giving a non-traditional flare to traditional desserts. I like to use them to make little, turnover-like pastries. Their taste is so neutral that you can stuff them with anything and it's bound to taste good. Here, I LOVE the taste of honey and poppyseed as a sweet finish to a light meal or an accompaniment to good tea.
As you'll see in a recipe below, my preferred method to prepare these is to deep fry them (I am from the midwest, after all). I feel it not only gives them a wonderful crispy texture, but by far produces the most beautiful result. The crispy, bubbly texture and shine that deep frying produces just beg to be eaten, and trust me, your guests will.

Deep Fried Wonton:
1 pkg wonton wrappers
Poppy Seed Filling (Recipe Follows, but you can purchase this ready-made)
Canola or Peanut Oil for Frying
Egg
Honey
Powdered Sugar

Poppy Seed Filling:
POPPY SEED FILLING:

1/2 c. poppy seed
1/4 c. whole milk
2T honey
1T sugar
Generous Pinch of Kosher salt
1 Egg Yolk

Mix first 5 ingredients in a saucepan over medium heat and cook till thick, stirring constantly. when complete, add a scant amount of the hot mixture to the yolk while stirring to keep it from cooking, and add this back into the hot mix, again while stirring. Allow to cool completely.

Once cool:

If you have a deep fryer, set it to 350 and allow the oil to heat. Take a wonton wrapper, and place about 1/2t of the poppyseed mix into the center. Using a small pastry brush, or your finger, brush a light amount of the egg wash on 2 edges of the wrapper that meet at a corner. Fold the wrapper over and seal, keeping as much air out of the wrapper as possible. Place these on a damp paper towel, and cover with another damp paper towel to keep from drying out.
When ready, start by placing 2-3 wontons in the fryer for about 5-10 seconds, and flip immediately to keep the other side from cracking. (otherwise you'll end up with an empty fried wrapper full of oil, and a fryer full of poppyseed filling) allow to fry for 30 secs and flip again. cook for another 15-20 secs and remove from oil, allow to drain completely, and place on a paper towel to allow the excess oil to drain off. Serve immediately on a plate, dredge lightly with powdered sugar and drizzle with honey.

Friday, June 4, 2010

Egg It On!


I'm making this a very short post and for a reason. You CAN make delicious and sophisticated food quickly. I promise.

Yeah, folks, you can totally just go on steaming that asparagus and squeezing a bit of lemon on there if that's your perogative. Just believe me when I tell you that the addition of just a little fat will increase your enjoyment 3.5 fold. Put that asparagus on a broiler pan, drizzle with olive oil, sprinkle some salt, grind some pepper. Cook till done (which means browned, crispy on the tips and oh sooooo good).

Do that. Note how it much better it tastes. Become an envy of all your friends. Write me an email of thanks. And no, I'm not Jesus. Not quite.

If you want to make it really stand out, do what I do and throw (gently place) a perfectly poached egg atop your bed of aspargus (and forget the useless vinegar in the poaching water).

So easy it's sick.

Thursday, May 27, 2010

The easy way out

By now, even with as few entries as there are in this blog, I'm guessing that most of you aren't reading much of the commentary that I've written in these entries. Nonetheless, I'm keeping up the hope that some of you are, in fact, keen on reading why I'm selecting certain recipes, and maybe even like what I have to say. (I'm not keeping my hopes up on that one though.)

Ultimately, once you get past the stories and the unnecessary raving that I do, you'll see that a theme starts to emerge: attention to the details. This theme permeates the various aspects of what I write. From the selection of ingredients, to the thoughtful nature of melding tastes, to the details of the periphery of a meal with friends, the details are what set you apart and make for successful entertaining.


Those of you who truly know me are chuckling to yourselves at this point. This is because my name and the phrase "detail oriented" don't really go hand in hand. Ultimately, I realize I'm inattentive and have learned to account for this. Thus is the point of my current entry.
There are ways to create an easy solution for any issue you encounter when planning to make a meal for people. In this case, I was asked to make a full meal for a gathering that was being held 450 miles from my home. Although this presents some problems for someone who forgets to pack socks on just about every trip he takes, there are some ways to account for the obvious difficulties.

It's difficult to plan a meal being prepared in a kitchen around the corner from your home, let alone 3 states away. For me, I always feel the need to bring half of my kitchen along with me to ensure I have the tools and ingredients I need, and invariably I find that this isn't necessary, oh well. Lately though, I've found a balance of comfort in following a few simple guidelines.

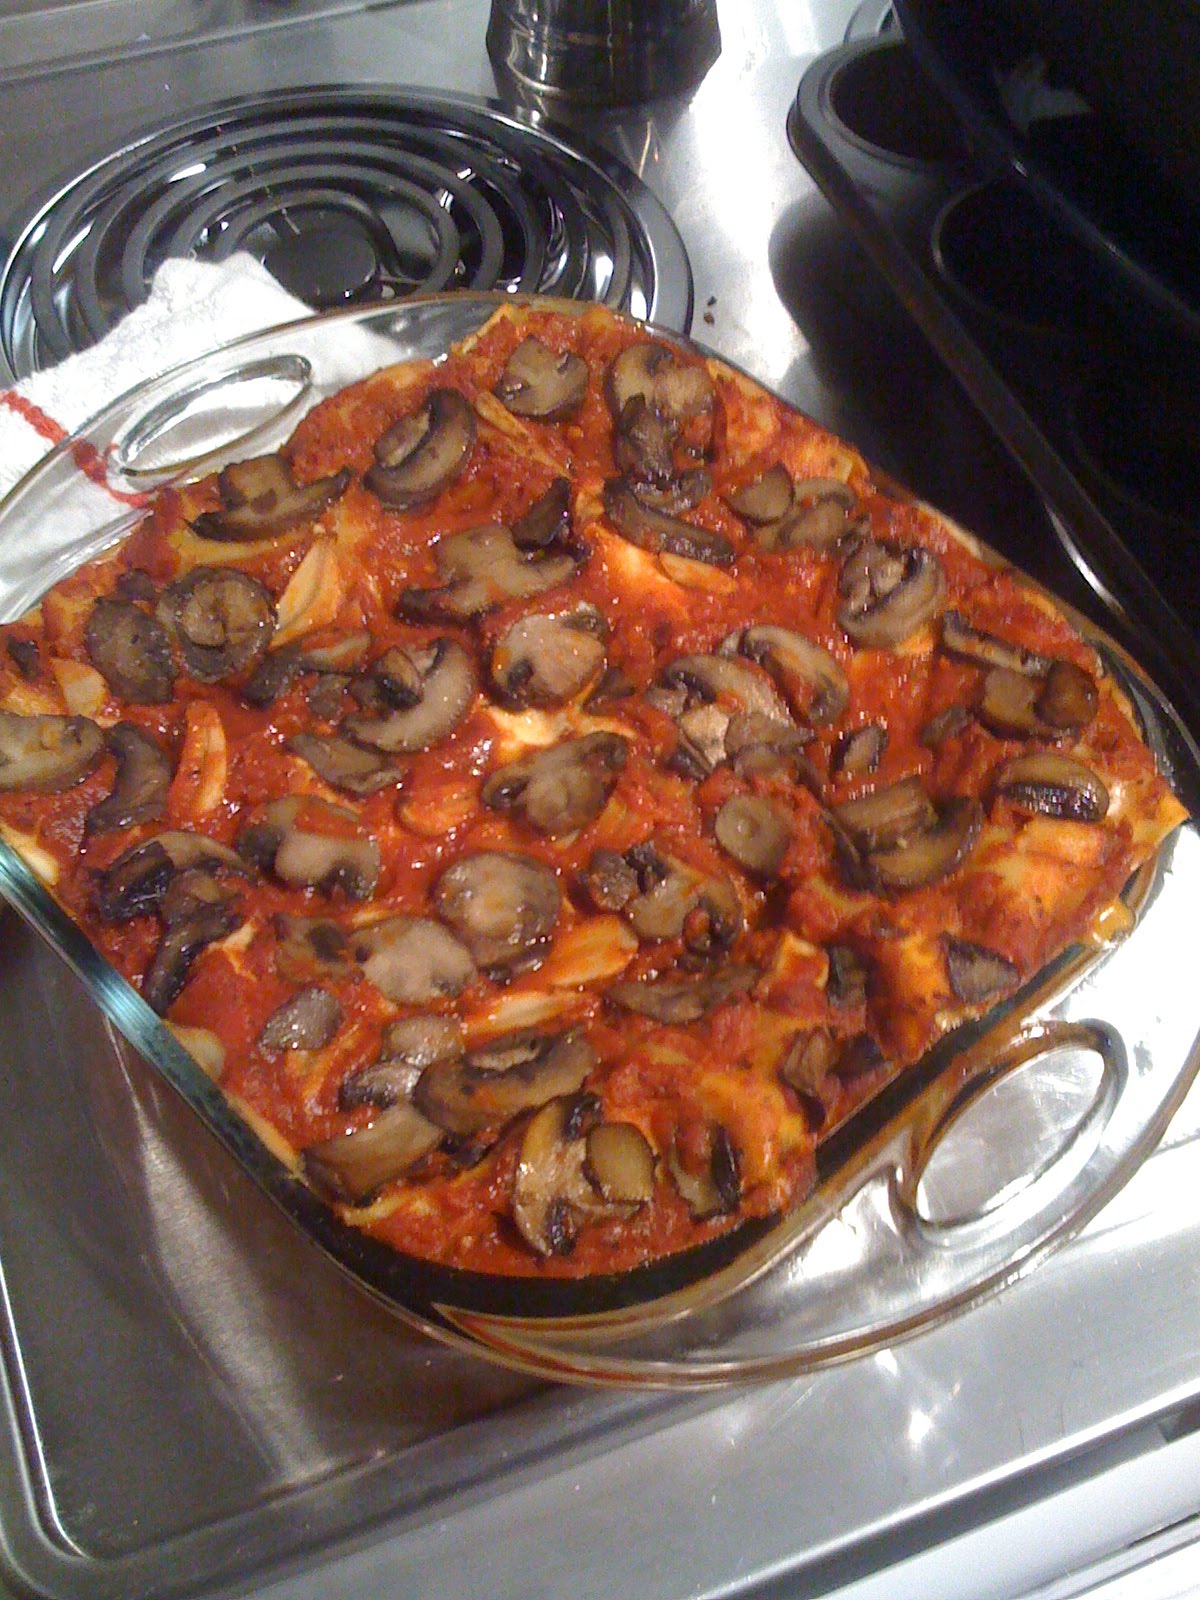
Meal selection: should include a main dish that's relatively simple with broad appeal, and should be one that much of the preparation can be done at home. (If this sounds like the method for preparing for a potluck, it should.) In this cas it's Lasagna. Which I prepared each item at home.

Preparation: Complete any preparation that requires uncommon tools at your own home. Avoid dishes where this preparation could inhibit the quality of the dish. Assume that most kitchens are going to have a decent chefs knife, a mixer, bowls and other common utensils as well as a stove, oven, and a microwave.

Ingredients: For a 7 hour drive, I wanted to select ingredients that wont go bad or sweat out over a trip. Lasagna was the perfect fit as it could be refrigerated, and all ingredients could be pre-cooked.

Transportation: Making sure you have everything should be reiterated, especially if your mind works in the same way as mine. And importantly, don't forget your socks. Hopefully your selection goes as well as mine. It's hard to go wrong with lasagna.

My traditional Lasagna:
Sauce:
1 can tomato sauce
1 can crushed tomatoes
1/4 c. Chopped Basil
3-5 cloves garlic chopped.
1T olive Oil
1T Oregano
Dash cinnamon.
1/2lb Ground beef browned drained and rinsed.
Salt, Pepper, Baking soda to taste.

Start by sauteeing the garlic and olive oil in a saucepan, do not allow to brown. Add the tomato sauce and the crushed tomatoes to the mix. bring to a light simmer and add basil oregano, cinnamon, salt pepper and baking soda (if necessary to reduce the acidity [normally only necessary when using fresh crushed tomatoes and sauce])add beef and remove from heat. Set aside.

Cheese Filling:
1 container of Ricotta cheese (forgive me for not knowing the size, get the large one if you're making a 9x13 pan and a small one for a 8x8 pan.)
1/4c breadcrumbs (fresh grated from day-old italian bread)
3T milk
1 1/2c Mozzarella cheese
1 egg
Black pepper

Asiago Bechamel(optional if you like cheesy lasagna)

2T Butter
4T Flour
1 clove garlic well chopped
3/4c cream
4-6oz asiago cheese (grated and tossed in 1t cornstarch)
Black pepper to taste.
Melt butter in the pan, and stir in flour. Add cream and bring to a simmer. slowly add the asiago by small handfuls into the mix until thick.

Lasagne:
1 box lasagne noodles prepared.
1lb Hot Sausage Browned drained and crumbled.
2c Baby portabella mushrooms, sliced and sauteed in olive oil
1 large can sliced black olives.
1c mozzarella shredded and 1c parmesean shredded mixed
1/2-3/4c shredded zucchini
Red Sauce
Ricotta Filling
Bechamel (Optional)

To Assemble the lasagne start by rubbing your pan with the olive oil and pour a thin layer of red sauce on the bottom of the pan. add a layer of pasta and then follow with thin layers of:
-Ricotta
-Parmesean mix
-Olives (all)
-red sauce
-Pasta
-zucchini
-sausage
-Red sauce
-Pasta
-Ricotta
-Parmesean mix
-mushrooms
-red sauce
-Pasta
-Red Sauce

By the way, if you're adding the bechamel sauce, add it right after the ricotta mix each time.

Bake this at 375-400 degrees for about an hour. in the last 10-15 minutes, add the remaining cheese mix to the top.
Allow to cool when you remove the lasagna from the oven slightly, this will allow it to set up some and it will be easier to serve.