Tuesday, August 17, 2010

Unconventional wake-up call

So, this one is going to be just a quick entry. I'm trying out adding entries by phone, so that I can share more of what I make.

This one though is about these amazing little corn fritters I had a craving for the other morning. I don't know what exactly brought this on, but my tummy is quite content that it did.
Although I like pancakes, I was craving something with a fair amount more flavor. These just fit the bill perfectly.

First, I made a small batch of cornbread batter: (all are approximate)
3/4c masa harina (Corn Flour),
1/4c flour,
1/8t Baking soda,
1/8t kosher salt,
1/2-//3c milk,
1/3c oil,
1egg,
2 ears corn (remove and blanch the kernels) [Or use 1c Canned Corn Drained and Rinsed]
Mix dry add in wet ingredients, stir till consistent. Add blanched corn.

Then, as many a wonderful recipe entails, I deep fry the batter:
In a deep skillet heat about 3/4" oil to medium-high heat. Scoop batter slow and low into the pan in ice cream scoop amounts. Cook each side 60-90 seconds. Scoop out of the oil and allow to drain to remove the excess oil. Place on a paper towel lined plate.

Last, add some flavor:
Here I made mine with bananas and maple syrup. You could do powdered sugar and strawberry jam, toasted pecans and honey, etc. The possibilities are endless.

Sunday, August 1, 2010

A tale of a late dinner.

Sometimes, your best ideas are borne out of necessity and scarcity. Thus was the case for Horacio and my dinner the other night. As it often does, it seems like it took almost no time for us to end up at the crossroads of dwindling daylight, closed grocery stores, not enough ingredients, and (most importantly) two very empty stomachs. A truly critical situation indeed.

So what was the solution to making a satisfying meal that was quick, simple, and tasty? Horacio's answer was Flautas, and I jumped at the opportunity to learn how to make one of my favorite dishes (and add a little of my own invention to boot.

Now, I'm almost embarrassed to say that my experience with Mexican food preparation consists of emptying the contents of a box, stirring everything together, and eating the whole thing on some variation of fried cornmeal. I've been slowly introducing myself to Latin cooking over the course of the last few months, but I've failed to focus on one regional style. Perhaps this was my time to change that... perhaps.

We quickly ran to the closest open store to pick up just a few remaining ingredients, but for the most part we had everything we needed. It never ceases to amaze me that most people need look no further than their own cabinets for the ingredients to make a great meal, and this was no exception. Too often I find myself heading to the store to buy groceries I just don't need, when I have the ingredients I need to make a fantastic meal on hand. I am usually just too lazy to think creatively about it.

The flautas were simple: take chicken breast, boiled in water, salt, and just a bit of olive oil (Horacio's task). wrap them in corn tortillas, and fry in a pan. Now, trust me when I say that you could stop right here. These were so simple yet so delicious that I could have just ate them as they came out of the pan. (I believe I may have even done this with once or twice without Horacio noticing.) Fear not though, this writer hasn't lost his mind. I was ABSOLUTELY NOT content with just the flautas and proceeded, while Horacio was preparing the chicken, to make a smoky, tangy, and most importantly hot-spicy sauce to compliment the delicious little flutes. I adapted my recipe for a chipotle-lime marinade to make a thick mole perfectly adapted to top or dip these finger foods in.

I am a huge proponent in the addition of heat to my cooking, but ONLY if it has flavor. I have little respect for sauces that are hot for the sole purpose of being hot, as they usually numb your tongue and have as much flavor as my gel insoles (when new, of course). But this sauce manages to be fresh and smokey, hot and bold, flavorful and full of a heat that conjures images of the coals of a campfire where the flames have just gone and all that's left are the red hot coals; a slow burn that simply builds and builds without getting in the way of all of the flavors that are present.

The best part is, the whole meal came together in less than an hour because there were two hands on the work, and the result was every bit as good as the meals I've spent days planning. Just remember, if you can't take the heat, stay out of our kitchen.

Chipotle Lime Mole:
1 can of Chipotle Peppers packed in Adobo.
The juice of 2 limes
3T of tequila
1T Water
1/4c Cilantro (optional)

Place all ingredients in a blender and blend to desired smoothness.


Flautas:
4 medium chicken breasts
Kosher Salt
Olive oil.
Queso Fresco
Chipotle Lime Mole
Vegetable oil for Frying

In a medium stock pot bring 6-8 cups of water and a healthy amount of salt to a boil (enough to cover the chicken breasts completely.) reduce to a lightly rolling simmer and add the olive oil and chicken to the water. Allow to boil for at least 40 mins until the chicken breast is tender and can easily be shredded with a fork. Remove breasts and shred on a plate. Then, in a deep skillet, add enough canola oil to fill about a 1/4" deep portion of the pan and bring to medium-high heat. Take a small amount of the shredded chicken and spread a thin line of the chicken onto a heated corn tortilla. (horacio proved me wrong that these should be heated in a microwave for about a full minute or so prior to adding the chicken in order for them to be pliable enough. Do so while they are wrapped in a wet paper towel.) Wrap the tortilla tightly around the chicken to create the "flute" and place, flap side down into the oil for about 90 seconds. Flip and continue cooking on the other side for another 60-90 seconds. Remove from oil, tilt to drain excess oil, and place on a paper-towel lined plate.

Plate the flautas on a plate, and top with the queso and the mole. Be sure to enjoy with your fingers, or you'll be missing out on all the fun. Last, be sure to keep a big glass of milk nearby for when the chipotles max out your tolerance.

Thursday, July 8, 2010

Removing My Ribs

No, this isn't a post about me undergoing the same surgery that Marilyn Manson allegedly went through, though they say it has it's advantages. This post covers something far more important (and I mean far more important) -- pork ribs.

Ahh Pork Ribs. Undeniable summery, undeniably messy and undeniably tasty. I am in love -- my favorite meat mingling with my favorite condiment in what is one of the most satisfying and comforting meals in your repertoire.

How to cook ribs is one of the most hotly debated issues in the culinary world. Barbecue gurus from different parts of the country can't even agree on whether barbecue represents the way the meat is cooked or the sauce in which is it (sometimes) smothered. Nor can rib aficianados decide how fall-off-the-bone they should be, or exactly what cooking method should be used. Yes, folks, disagreement is the hallmark of this unique little corner of food nirvana. Read this paragraph as a disclaimer that while the way I "barbecue" ribs might be vastly different than the way you do, it results in a damn good final product.

One more thing before I get down to brass tacks -- I mentioned that some question whether ribs should fall off the bone or not. I say, they should. You should be able to grab each individual rib and yank it cleanly out of it's meaty home.

So here are today's players:

You obviously need ribs:
St. Louis Ribs.

For the liquid in which the ribs are cooked:
3/8 Barbecue Sauce
3/8 Beef Stock
1/4 Red Wine Vinegar

For delicious purposes:
More Barbecue Sauce

Simply combine all three liquids in a bowl and stir together (it will be fairly thin). Please don't measure them. Just make sure you have more barbecue and beef stock than vinegar. Taste it, and make sure it's not too vinegary. Now you're going to place your ribs in a baking pan that can accomodate and dump your saucy mixture on top. You want the ribs to be nearly completely covered, if they are sticking out a little bit that's fine. Cover tightly with foil and toss in your preheated 350 degree oven for about 3 or 4 hours (one of my good buddies once did about 10 hours once, but only because we sort of forgot about them, I don't recommend cooking them for that long).

You'll know the ribs are done when they fall apart if you look at them cross. Gingerly transfer the ribs from the liquid onto a broiler pan. Brush a coat of sauce on the ribs; toss under the broiler, lick your lips, pace around the kitchen, peak 2-3-4 times, remove from broiler (the sauce will get nice and bubbly, if you're patient, you can let it start to really caramelize nicely (I am not patient).

Break out the wet naps and serve with some mashed or crash hot potatoes and corn on the cob. No, you don't have to send me a thank you card.

A note about BBQ Sauce: I do not make my own. I use Sweet Baby Rays which, for my money, is the best commercially available sauce on the market. Feel free to doctor it up, but I doubt you will see the need.

The Simple Things

There are certain things that they say are tied very closely to memories. I believe food is definitely one of those things. If you've read my recently posted autobiography (yes, with all it's typos) you'll see that I truly believe this. Lately I have a tendency to be making some rather complex and diverse foods, but these are not the ones I tend to remember as fondly. What does tend to be tied more closely to my memories are the ones steeped in simplicity.

One of the best examples of these is Sunday morning Tea with my father. On many a Sunday morning, while waiting to get ready for church, I can remember sitting on my fathers lap, wearing an oversized tee-shirt that I slept in the night before reclined in a chair in the living room and sharing a cup of strong Lipton Tea with lots of Milk and sugar(a tradition that originates with my Grandma Margie). My favorite part of this though was the Cinnamon-sugar toast that dad would make to have with the tea.
I can remember making the tea in the microwave, I didn't even realize that normally the tea would be made in a kettle until later when I would share the same tradition with my grandmother. My father would save the teabag on the sill behind the sink to brew another cup later. I remember ignoring the television (which was invariably set to CBS sunday morning, a show no 5 year old in his or her right mind would be interested in), and I remember the sweet and savory taste of the buttered cinnamon toast being the best breakfast I could have.
Nowadays, I find that life can be pretty stressful, it can be depressing, it can seem downright overwhelming. Now I understand why my father, and my grandmother, continued these traditions. Now when I find my world to be a little overwhelming, or if I find that I miss my dad or grandma, that such a simple treat can bring back so many of the things that made me so happy as a kid. It never ceases to amaze me how happy it can still make me now.

Tea:
1 Bag strong pekoe Tea (Lipton or PG Tips works best)
2-3T of Milk
2t Sugar (at least)
8oz boiling water
Steep Briskly for 4 minutes to get a very strong brew. Grandma would always retrieve the teabag with a spoon and wrap the string around it to squeeze the bitter stuff out. stir in the remaining ingredients.

Toast:
2 slices white bread toasted to a rich golden brown and generously buttered.
2T White Sugar
3/4t Cinnamon.
mix the cinnamon and sugar and sprinkle liberally on the buttered toast as the butter is melting. Enjoy with Tea.

Sunday, June 13, 2010

A crispier side

Every now and again, I find an ingredient that I just don't know how I ever survived without. Usually these ingredients make this distinction because of their taste, but on special occasions I come across something so simple, so flexible, that it becomes a staple in my kitchen.


One of these ingredients are wonton wrappers. These little squares are probably one of the most flexible food items I've ever found. You can use them for everything sweet, savory, fried, baked, steamed. They are every bit as flexible as pasta, and yet so completely underused. I like underused though, because to me, this translates to "special"
I've used these to make foods that are always met with high regard. They've seen their way into my Best Friend's wedding shower, My first dinner invite to my new coworkers, First Dates, and the list goes on.
I think these are a perfect compliment to sweets, giving a non-traditional flare to traditional desserts. I like to use them to make little, turnover-like pastries. Their taste is so neutral that you can stuff them with anything and it's bound to taste good. Here, I LOVE the taste of honey and poppyseed as a sweet finish to a light meal or an accompaniment to good tea.
As you'll see in a recipe below, my preferred method to prepare these is to deep fry them (I am from the midwest, after all). I feel it not only gives them a wonderful crispy texture, but by far produces the most beautiful result. The crispy, bubbly texture and shine that deep frying produces just beg to be eaten, and trust me, your guests will.

Deep Fried Wonton:
1 pkg wonton wrappers
Poppy Seed Filling (Recipe Follows, but you can purchase this ready-made)
Canola or Peanut Oil for Frying
Egg
Honey
Powdered Sugar

Poppy Seed Filling:
POPPY SEED FILLING:

1/2 c. poppy seed
1/4 c. whole milk
2T honey
1T sugar
Generous Pinch of Kosher salt
1 Egg Yolk

Mix first 5 ingredients in a saucepan over medium heat and cook till thick, stirring constantly. when complete, add a scant amount of the hot mixture to the yolk while stirring to keep it from cooking, and add this back into the hot mix, again while stirring. Allow to cool completely.

Once cool:

If you have a deep fryer, set it to 350 and allow the oil to heat. Take a wonton wrapper, and place about 1/2t of the poppyseed mix into the center. Using a small pastry brush, or your finger, brush a light amount of the egg wash on 2 edges of the wrapper that meet at a corner. Fold the wrapper over and seal, keeping as much air out of the wrapper as possible. Place these on a damp paper towel, and cover with another damp paper towel to keep from drying out.
When ready, start by placing 2-3 wontons in the fryer for about 5-10 seconds, and flip immediately to keep the other side from cracking. (otherwise you'll end up with an empty fried wrapper full of oil, and a fryer full of poppyseed filling) allow to fry for 30 secs and flip again. cook for another 15-20 secs and remove from oil, allow to drain completely, and place on a paper towel to allow the excess oil to drain off. Serve immediately on a plate, dredge lightly with powdered sugar and drizzle with honey.

Friday, June 4, 2010

Egg It On!


I'm making this a very short post and for a reason. You CAN make delicious and sophisticated food quickly. I promise.

Yeah, folks, you can totally just go on steaming that asparagus and squeezing a bit of lemon on there if that's your perogative. Just believe me when I tell you that the addition of just a little fat will increase your enjoyment 3.5 fold. Put that asparagus on a broiler pan, drizzle with olive oil, sprinkle some salt, grind some pepper. Cook till done (which means browned, crispy on the tips and oh sooooo good).

Do that. Note how it much better it tastes. Become an envy of all your friends. Write me an email of thanks. And no, I'm not Jesus. Not quite.

If you want to make it really stand out, do what I do and throw (gently place) a perfectly poached egg atop your bed of aspargus (and forget the useless vinegar in the poaching water).

So easy it's sick.

Thursday, May 27, 2010

The easy way out

By now, even with as few entries as there are in this blog, I'm guessing that most of you aren't reading much of the commentary that I've written in these entries. Nonetheless, I'm keeping up the hope that some of you are, in fact, keen on reading why I'm selecting certain recipes, and maybe even like what I have to say. (I'm not keeping my hopes up on that one though.)

Ultimately, once you get past the stories and the unnecessary raving that I do, you'll see that a theme starts to emerge: attention to the details. This theme permeates the various aspects of what I write. From the selection of ingredients, to the thoughtful nature of melding tastes, to the details of the periphery of a meal with friends, the details are what set you apart and make for successful entertaining.


Those of you who truly know me are chuckling to yourselves at this point. This is because my name and the phrase "detail oriented" don't really go hand in hand. Ultimately, I realize I'm inattentive and have learned to account for this. Thus is the point of my current entry.
There are ways to create an easy solution for any issue you encounter when planning to make a meal for people. In this case, I was asked to make a full meal for a gathering that was being held 450 miles from my home. Although this presents some problems for someone who forgets to pack socks on just about every trip he takes, there are some ways to account for the obvious difficulties.

It's difficult to plan a meal being prepared in a kitchen around the corner from your home, let alone 3 states away. For me, I always feel the need to bring half of my kitchen along with me to ensure I have the tools and ingredients I need, and invariably I find that this isn't necessary, oh well. Lately though, I've found a balance of comfort in following a few simple guidelines.

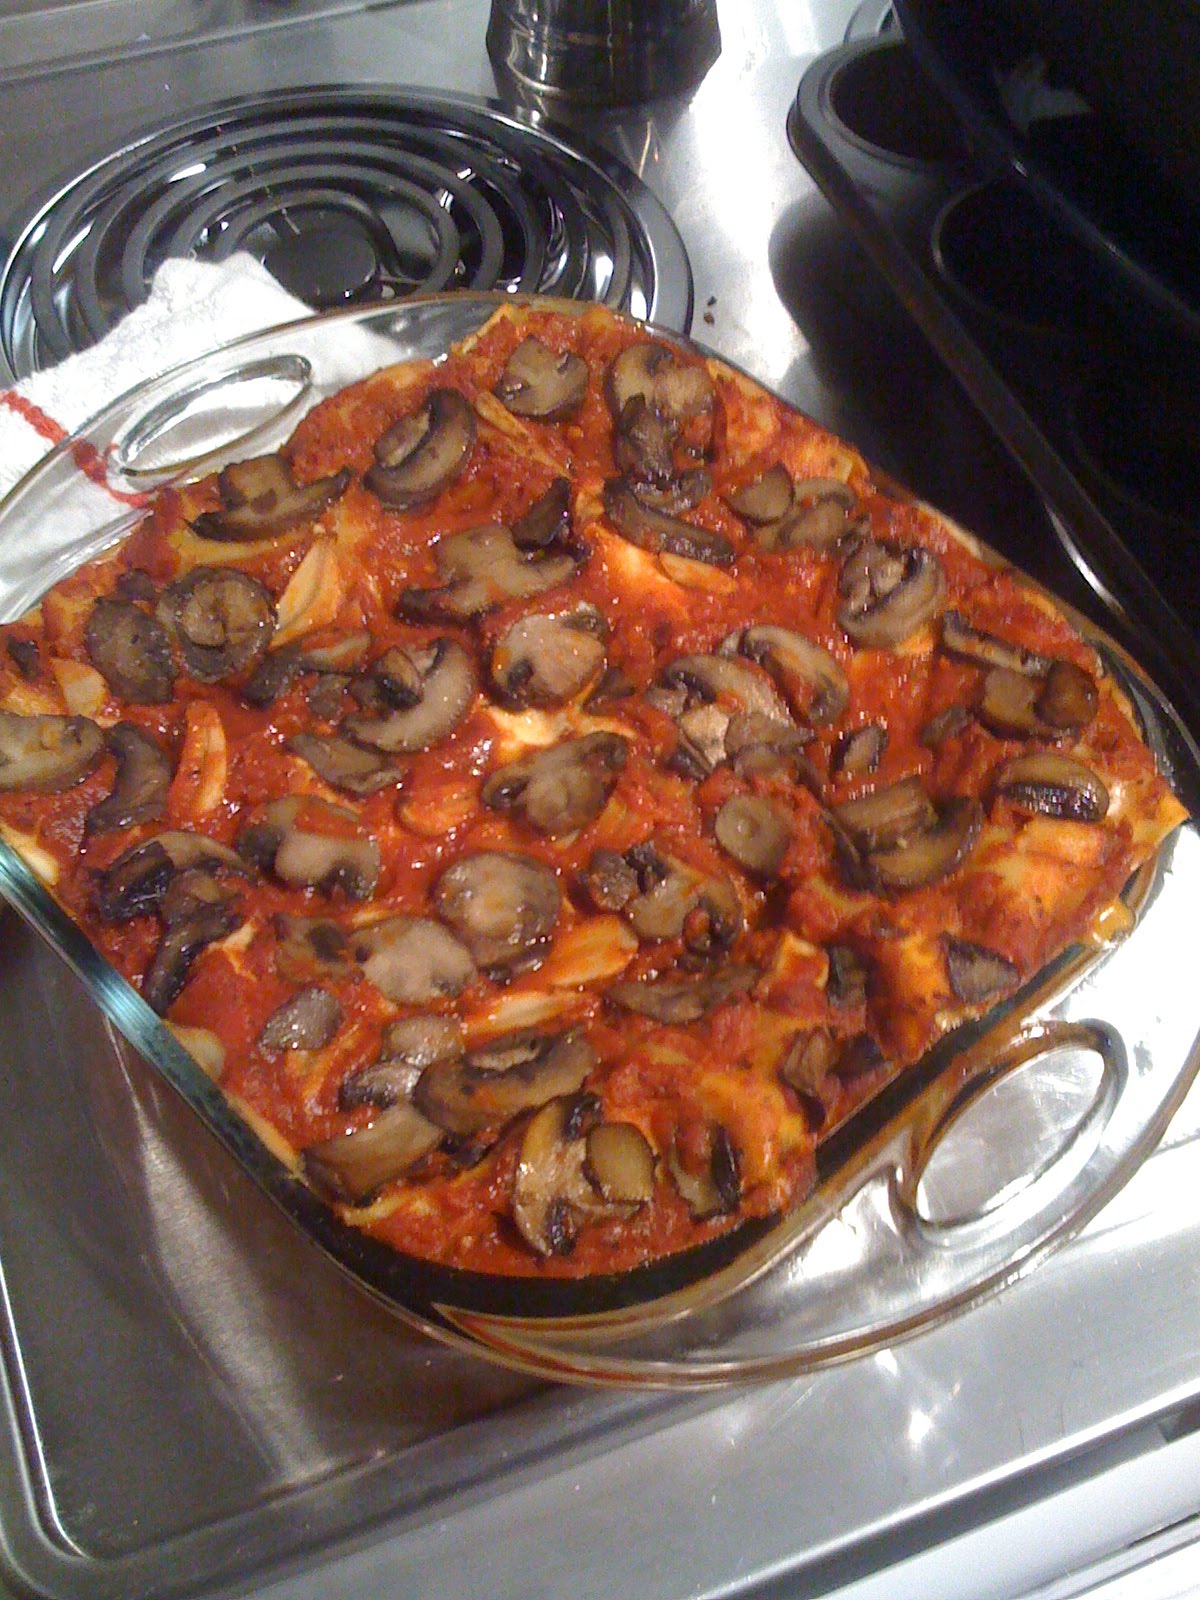
Meal selection: should include a main dish that's relatively simple with broad appeal, and should be one that much of the preparation can be done at home. (If this sounds like the method for preparing for a potluck, it should.) In this cas it's Lasagna. Which I prepared each item at home.

Preparation: Complete any preparation that requires uncommon tools at your own home. Avoid dishes where this preparation could inhibit the quality of the dish. Assume that most kitchens are going to have a decent chefs knife, a mixer, bowls and other common utensils as well as a stove, oven, and a microwave.

Ingredients: For a 7 hour drive, I wanted to select ingredients that wont go bad or sweat out over a trip. Lasagna was the perfect fit as it could be refrigerated, and all ingredients could be pre-cooked.

Transportation: Making sure you have everything should be reiterated, especially if your mind works in the same way as mine. And importantly, don't forget your socks. Hopefully your selection goes as well as mine. It's hard to go wrong with lasagna.

My traditional Lasagna:
Sauce:
1 can tomato sauce
1 can crushed tomatoes
1/4 c. Chopped Basil
3-5 cloves garlic chopped.
1T olive Oil
1T Oregano
Dash cinnamon.
1/2lb Ground beef browned drained and rinsed.
Salt, Pepper, Baking soda to taste.

Start by sauteeing the garlic and olive oil in a saucepan, do not allow to brown. Add the tomato sauce and the crushed tomatoes to the mix. bring to a light simmer and add basil oregano, cinnamon, salt pepper and baking soda (if necessary to reduce the acidity [normally only necessary when using fresh crushed tomatoes and sauce])add beef and remove from heat. Set aside.

Cheese Filling:
1 container of Ricotta cheese (forgive me for not knowing the size, get the large one if you're making a 9x13 pan and a small one for a 8x8 pan.)
1/4c breadcrumbs (fresh grated from day-old italian bread)
3T milk
1 1/2c Mozzarella cheese
1 egg
Black pepper

Asiago Bechamel(optional if you like cheesy lasagna)

2T Butter
4T Flour
1 clove garlic well chopped
3/4c cream
4-6oz asiago cheese (grated and tossed in 1t cornstarch)
Black pepper to taste.
Melt butter in the pan, and stir in flour. Add cream and bring to a simmer. slowly add the asiago by small handfuls into the mix until thick.

Lasagne:
1 box lasagne noodles prepared.
1lb Hot Sausage Browned drained and crumbled.
2c Baby portabella mushrooms, sliced and sauteed in olive oil
1 large can sliced black olives.
1c mozzarella shredded and 1c parmesean shredded mixed
1/2-3/4c shredded zucchini
Red Sauce
Ricotta Filling
Bechamel (Optional)

To Assemble the lasagne start by rubbing your pan with the olive oil and pour a thin layer of red sauce on the bottom of the pan. add a layer of pasta and then follow with thin layers of:
-Ricotta
-Parmesean mix
-Olives (all)
-red sauce
-Pasta
-zucchini
-sausage
-Red sauce
-Pasta
-Ricotta
-Parmesean mix
-mushrooms
-red sauce
-Pasta
-Red Sauce

By the way, if you're adding the bechamel sauce, add it right after the ricotta mix each time.

Bake this at 375-400 degrees for about an hour. in the last 10-15 minutes, add the remaining cheese mix to the top.
Allow to cool when you remove the lasagna from the oven slightly, this will allow it to set up some and it will be easier to serve.